Painting The Corvette Body
I accomplished this project with the assistance of my good friend and part time auto painter, Ernie Orwig. Actually, the truth of the matter is, Ernie painted the car with my untrained but eager assistance...
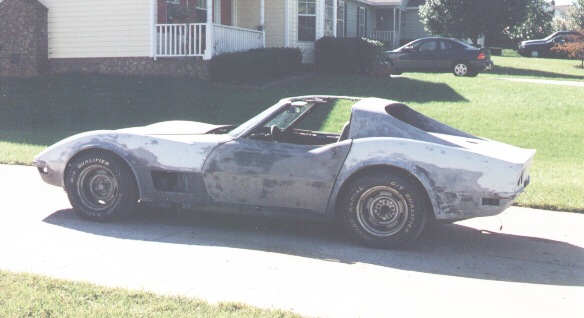
Stripping The Old Paint Off
We started in early October of 1999. The first task was to remove the chrome, emblems, grills and any other items that weren't riveted or otherwise permanently a part of the Corvette's fiberglass body. Within an hour or two we had the job completed and then moved on to the process of actually stripping off the old paint.
To remove the paint quickly and not harm the fiberglass underneath, we selected a product called appropriately enough: Fiberglass Paint Stripper, manufactured by Klean-Strip. Ernie poured a generous amount of the liquid stripper over a small area of the car and let it set. Within seconds you could see the old paint begin to wrinkle and lift up from the fiberglass. After waiting a few minutes, Ernie took a putty knife and scraped up the softened paint and placed it in a bucket (for responsible disposal at a later date). We repeated this process for the better part of several hours until the entire car was stripped. Next, Ernie went over the car with a rag generously soaked in lacquer thinner. My job was to quickly follow Ernie with a clean, dry rag and wipe the car dry. We did this to remove the small spots of paint left over from the liquid stripper.
Body Work
Once the car was stripped of it's old paint, we began the tedious process of fixing minor body flaws. This part of the project took around two months of working in the evenings to complete. Unfortunately, I don't have any pictures of this phase but here's the essentials of what we did:
-
Fiberglass The Seams - along each side of a Corvette body is a seam
where the upper and lower fiberglass panels were bonded together by GM.
This seam is notorious for cracking and then showing through a paint job.
To prevent this from happening to my car, we took an air powered angle
grinder with a sanding disk attached and ground a shallow trough (roughly
an 1/8th inch deep) over the panel seam. Then we laid a single layer
(about 1 inch wide) of random weave fiberglass soaked with resin and
hardener in the trough. This joined the top panel to the botttom panel
with a fiberglass binder, effectively creating one solid fiberglass panel.
After the resin cured, we ground our fiberglass seam down until it was
slightly lower than the adjacent panels. This slight depression was
covered with Bondo and then sanded smooth.
- Fix the passenger door - years ago, a neighbor of mine backed into the passenger door with her pickup truck. The window was broken and the fiberglass door panel was damaged. I took my Corvette to a chevy dealer, figuring they would know best how to repair the car (hey, I was young and stupid). Anyway... ever since then, I had a 'not so even' gap between the lead edge of the door and the rear edge of the front fender. We used a product called Everglass, manufactured by Evercoat to build up the lead edge of the door. Everglass is a filler, much like Bondo but it has short strand fibers imbedded which make it incredibly strong after it cures. After building up the door, we sanded the lead edge so that it had a nice uniform gap with the front fender.
- Fix the rear spoiler - some time after the passenger door was damaged, I was sitting at a stop sign, waiting to make a turn. The guy behind me didn't stop soon enough and ran into the right rear corner of my car (I have great luck, don't I?). This time I was older and wiser and decided to take my Corvette to a... you got it... Corvette repair shop, specializing in Corvette repairs. They repaired my car but the symmetry was lost along the rear spoiler. This is where Ernie gained 'hero' status in my book. With a careful application of Everglass and Bondo followed by skillful sanding, he restored the perfect symmetry of the rear spoiler. It was great fun watching a master at work.
-
Sand the body smooth - Before we primed the car, we went over the
entire body and removed any left over paint we missed from the stripping
process. We also found little imperfections here and there that we either
sanded down or filled in with Bondo and then sanded down. At this point,
the car was as smooth as the eye and hand could detect.
Primer Coats
Now that the body was prepped, Ernie introduced me to the joys of priming
and block sanding. First, we wiped the car real well with a lacquer thinner
soaked rag to remove any dirt, oil or grime. Then we let the car air dry.
The primer Ernie selected was Universal HS Primer Filler (285-60) by
Glasurit . Mixed with the primer base was HS Hardener (929-81) and
Normal Reducer (352-91) also by Glasurit and according to the
manufacturer's mixing ratios.
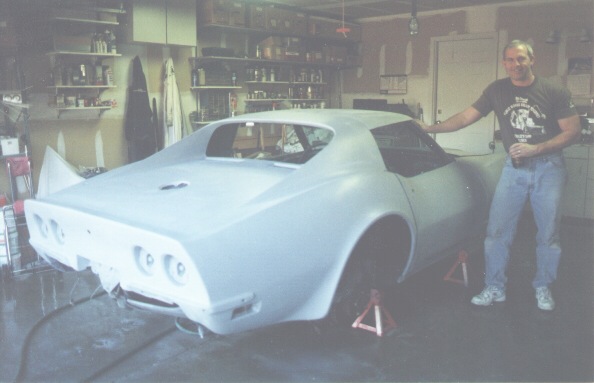
Ernie sprayed the primer on my Corvette
and made it look so easy. The first coat didn't take long to apply and I
thought it looked pretty good. The car was now one solid color and all our
body repairs were all nicely hidden away.
 |
Within an hour or so, the primer had sufficiently dried and then Ernie "misted" the car with black lacquer paint (DDL 9300 by PPG). By misting, I mean he just lightly sprayed the paint over the car, giving it a dark gray appearance because the paint wasn't on very thick and the light gray primer was still showing through.
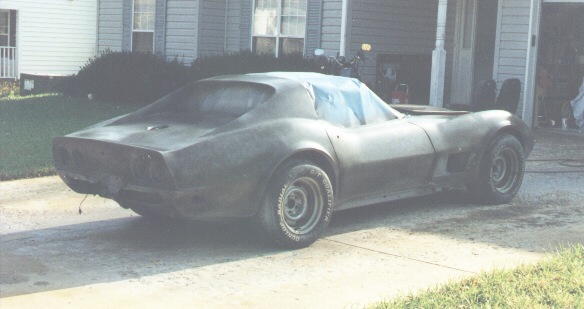
Block Sanding
Although the body of the car looked smooth, in reality there were high spots and low spots. The idea behind block sanding is to use a sanding block to evenly wet sand an area down. The high spots will get sanded first and the light gray primer will be exposed. The low spots will still look dark gray. As soon as an area had spots where we just went through the primer to the fiberglass as well as spots that looked dark gray, we moved on to another area of the car.
To do the wet sanding, we used 320 grit wet/dry sanding paper and a bucket of water with just a few drops of dish detergent added (Ernie says this helps prevent the sandpaper from clogging up). We used two sanding blocks. One was short, measuring 2 and 3/4 by 5 inches and the other was longer, measuring 2 and 3/4 by 8 and 1/2 inches. For the large flat areas we used the longer sanding block and we used the shorter sanding block for areas where the longer block didn't work so well. For curved areas we used a flat rubber squeegee with sandpaper wrapped around it.
After Ernie gave me instructions on the fine art of wet sanding, I was turned loose and sanding away I went. One of my instructions from Ernie was to discard my piece of sand paper as soon as it started to lose its effectiveness. I had trouble following that instruction and tended to work too long with old sand paper. Of course, since this was my project and I was paying for the sand paper and not Ernie... I wanted to get the most from my investment. On the other hand, Ernie was getting a lot more work done than I was...
In time we finished wet sanding the primer on the entire car. Then we cleaned the car with Acryli-Clean (DX 330) from PPG which is a wax and grease remover. After cleaning the car, the entire process of priming, misting and wet sanding repeated itself. We did this cycle three, maybe four times. This part of the project really became "work" for me. It's not terribly hard or complicated but I found it very boring. I noticed that Ernie was doing less and less and I was doing more and more. I guess when you're a world famous painter like Ernie, you can pick and choose what work you do and after all... it was my car.
After these several primer coats, all the low areas were built up and our last sanding effort left no dark gray areas showing. Ernie was now satisfied that the body was sufficiently flat. To seal the primer, Ernie sprayed one last primer coat. For this he used an epoxy primer, Prima K36 from PPG, mixed with Hardener K201 also from PPG.
Base Coat/Clear Coat
We let the epoxy primer cure for a day (as per the manufacturer's spec. sheet). The next day we began the final step of spraying the base coat, followed by the clear coat. Since the epoxy primer had not been touched by human hands, we only went over it with a new tack cloth. This was to remove any dust that might have settled on the car.
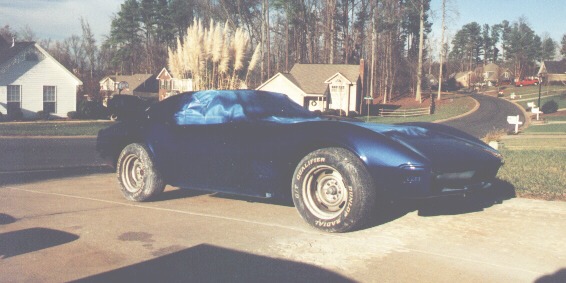
After the car was prepped, Ernie sprayed the base coat, which is a light metal flake called "Targa Blue". This was the original OEM color of this Corvette and also a favorite of mine. Although I stayed with the original color, I decided to go with a base coat/clear coat, as opposed to the original lacquer paint. I thought this would provide a more durable finish. We used PPG paint, thinned with DT 870 Reducer from PPG.
We sprayed the base coat in the morning and then later that afternoon we sprayed the clear coat (OK, Ernie sprayed the base and clear coats, I just stayed out of his way...). For the clear coat we used Urethane Clear (DCU 2021), mixed with Reducer (DT 870) and High Solids Hardener (DCX 8), all from PPG. We followed the manufacturer's spec. sheets and used their mixing ratios.
Ernie let the clear coat cure for about a week and then we wet sanded it, using 1000 grit Unigrit Finishing Paper from Meguiar's, followed by 1500 grit, also from Meguiar's. The reason for wet sanding the clear coat was to remove any 'orange peel' affect and any dust specks that managed to get into the paint.
It was a sad thing to see my car's finish go from shiny (although somewhat imperfect) to this dull, wet sanded look. Ernie soon fixed that problem by buffing the clear coat. First he used Perfect-It II Rubbing Compound by 3M, followed by Perfect-It Foam Polishing Pad Glaze, also by 3M.
Final Thoughts
Two things stand out in my mind after painting my Corvette's body. First, the actual spraying of the paint looked relatively easy and occurred pretty quickly. It's the prep work that took the longest time and in my opinion, will make or break an excellent paint job. Second, we converted my garage into a temporary spray booth for this painting project. That should be considered a 'last resort' option. If you want to paint your car, I would highly recommend renting or using someone's spray booth. You'll get a better finish, with much less complaining from the wife...
Ernie told me from the beginning that he was going to give my car a finish that would be so bright and shiny that it would "hurt my eyes". Well Ernie... I think you may have pulled it off.